Ligne temporelle
Vue générale
Editing in the timeline is the most common workflow inside Zrythm. The timeline section consists of the tracklist on the left and the ruler/arranger on the right, along with a timeline-specific toolbar at the top.
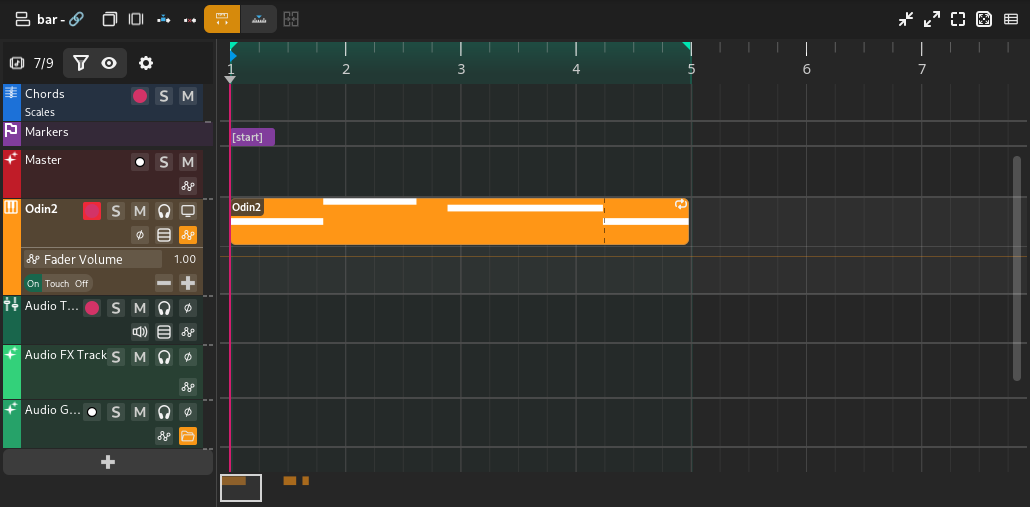
Mini carte de la ligne temporelle
La ligne temporelle minimap est une petite boîte qui représente la zone visible actuelle de la ligne temporelle. Elle peut être déplacée et redimensionnée pour modifier la zone visible.

Règle
The ruler is mainly used to control looping and playback.

The ruler will display more or less information depending on the current zoom level. It will also display the following markers/indicators discussed in Points de bouclage.
- Point de repère
Affiché sous la forme d’une flèche bleue pointant vers la droite.
- Position de la tête de lecture
Représenté par une flèche grise orientée vers le bas.
- Points de bouclage
Représenté par 2 flèches vertes, et la zone entre elles est affichée en vert vif si la boucle est activée, ou en gris si elle est désactivée. Peut être glissé pour être repositionné.
Astuce
Looping can be enabled/disabled using the loop button in the transport controls.
Clicking and dragging on empty space in the bottom half of the ruler will allow you to reposition the playhead.
Astuce
You can Control-click and drag the loop region to move it.
Définir le point de repère
Double click inside the ruler to set the cue point. This will be used to return to when playback is stopped.
Range Selection
Clicking and dragging in the top half of the ruler will create a range selection. If an existing range exists, you can click an drag it to move it.
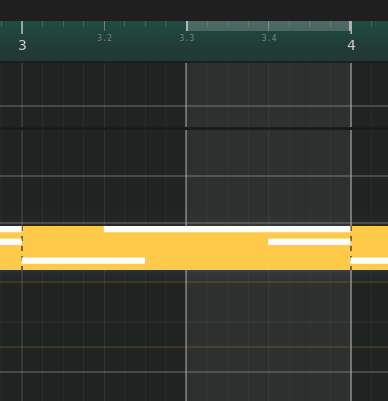
Range selection
Arrangeur
The timeline arranger is the main area where the song is composed. It consists of a collection of events, such as regions, positioned against time. Some events (such as regions) will open separate windows for further editing when clicked.
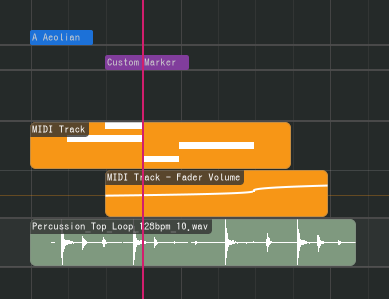
La ligne temporelle est divisée en une ligne temporelle supérieure qui reste fixe sur le dessus et une ligne temporelle déroulante en dessous. De cette façon, vous pouvez épingler les pistes que vous voulez toujours voir en haut.
Arranger Objects
The following arranger objects can exist inside the timeline.
Régions
Regions (or clips) are containers for events or data (such as MIDI notes and audio clips - see below) that can be edited in an editor. Regions can be repeated, like below.

Région
The following types of regions exist.
Régions audio
Audio regions contain audio clips from audio files.
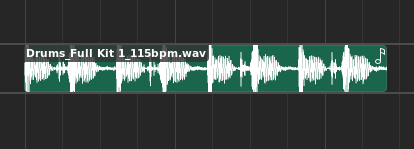
Audio region
Audio regions belong to track lanes and appear inside Audio tracks.

Audio track with audio region
Double-clicking an audio region will bring up the audio editor.
Régions MIDI
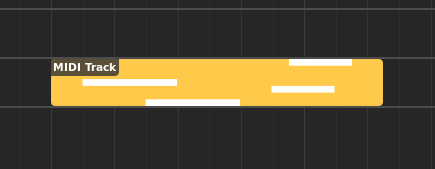
MIDI regions contain MIDI notes.
Éditer des Régions
MIDI regions belong to track lanes and appear inside MIDI or Instrument tracks.

MIDI track with MIDI region
Double-clicking a MIDI region will bring up the piano roll.
Automation Regions
Automation regions contain automation events.
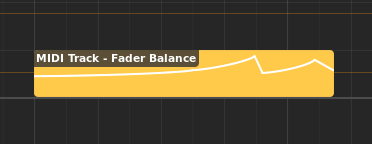
Automation region
Automation regions appear inside automation lanes.

Automation lane with automation region
Double-clicking an automation region will bring up the automation editor.
Chord regions
Chord regions contain sequences of chords.

Chord region
Chord regions appear inside the chord track.

Chord track with chord region
Double-clicking a chord region will bring up the chord editor.
Marqueurs
Markers are used to mark the start of a logical section inside the song, such as Chorus or Intro.

Marqueur
Markers appear inside the marker track.

Marker track with marker
There are two special markers that signify the start and end of the song that are used for exporting the song and cannot be deleted.
Gammes
Scales are used to indicate the start of a section using a specific musical scale.

Scale
Scales appear inside the Chord track.

Chord track with scale
Éditer des Régions
The following operations apply to regions.
Renaming
Regions can be renamed by selecting them and pressing F2.
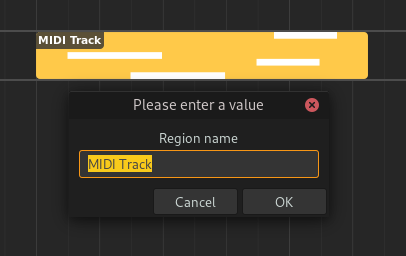
Renaming a region
Adjusting Fades
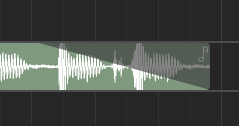
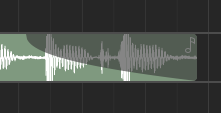
Audio regions can have fades. Fades are gradual increases or decreases in the level of the audio signal, and their positions can be adjusted by clicking and dragging the top left/right corners of the region.
Adjusting fade out point (click & drag)
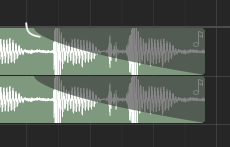
Adjusting fade out point (drop)
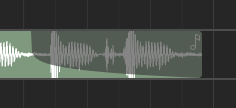
Clicking and dragging the grey part up or down will adjust the curviness of the fade.
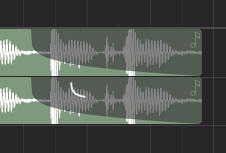
Adjusting curviness
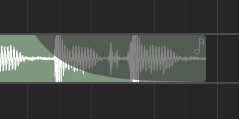
The type of fade algorithm used can also be changed by right-clicking on the fade and selecting .
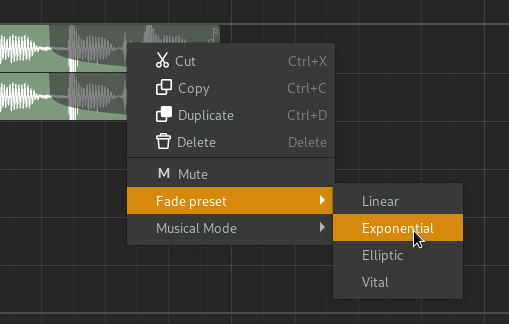
Fade context menu
Fade Types
The various types of fade algorithms available are illustrated below.
Note
All audio regions have some additional, built-in fade in and fade out that cannot be disabled. This is used to avoid clipping and should be unnoticable.
Editing Region Contents
Displaying Region Contents
Quand des régions sont sélectionnées dans la ligne temporelle, leurs contenus seront affichés dans l’onglet Éditeur dans le Bottom Panel. Même s’il existe des éléments communs partagés parmi chaque type d’éditeur, la section d’éditeur différera selon le type de région sélectionnée.

Editor Ruler
The editor ruler is similar to the timeline ruler.

Editor ruler
The ruler will display more or less information depending on the current zoom level. It will also display the following indicators.
Editor Ruler Indicators
- Song Markers
Markers created in the Marker track will be displayed here as read-only.
- Clip Start
Controls the position where the clip will start playback from. Displayed as a red, right-pointing arrow.
- Tête de lecture
Current position of the playhead. Displayed as a grey, down-facing arrow.
- Points de bouclage
These control the range where the clip will loop after it reaches the loop end point. Displayed as 2 green arrows.
You can move these markers by clicking and dragging.
Clicking and dragging on empty space will allow you to reposition the playhead.
Regions in the Editor Ruler
All regions in the same track as the active region will be shown inside the ruler. The active region will be displayed in a more prominent color.

Regions in the editor ruler
