Línea de tiempo
Generalidades
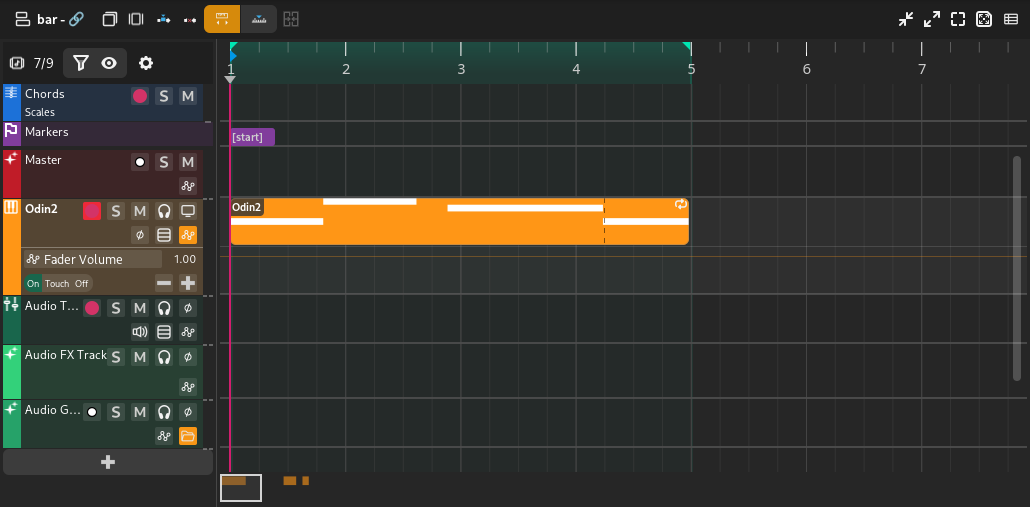
Editing in the timeline is the most common workflow inside Zrythm. The timeline section consists of the tracklist on the left and the ruler/arranger on the right, along with a timeline-specific toolbar at the top.
Minimapa
El minimapa de la línea de tiempo es un pequeño cuadro que representa su área visible actual. Se puede mover y cambiar de tamaño para cambiar el área visible.

Regla
La regla se utiliza principalmente para controlar el bucle y la reproducción.

La regla mostrará más o menos información según el nivel de zoom actual. También mostrará los siguientes marcadores/indicadores mencionados en Puntos del bucle.
- Punto de referencia
Se representa con una flecha azul que apunta a la derecha.
- Playhead position
Se muestra como una flecha gris hacia abajo.
- Puntos del bucle
Se muestran como 2 flechas verdes, y el área entre ellas se muestra en verde brillante si el bucle está activado o gris si está desactivado. Se puede arrastrar para cambiar la posición.
Truco
Looping can be enabled/disabled using the loop button in the transport controls.
Clicking and dragging on empty space in the bottom half of the ruler will allow you to reposition the playhead.
Truco
You can Control-click and drag the loop region to move it.
Establecer el punto de referencia
Haz doble clic dentro de la regla para establecer el punto de referencia, al cual se volverá cuando la reproducción se detenga.
Selección de intervalo
Clicking and dragging in the top half of the ruler will create a range selection. If an existing range exists, you can click an drag it to move it.
Selección de intervalo
Arranger
El estructurador de línea de tiempo es el área principal donde se compone la canción. Se compone de una colección de sucesos, como regiones, posicionados en el tiempo. Algunos sucesos (como las regiones) abren ventanas separadas para su edición cuando se pulsa sobre ellos.
El arreglador de la línea de tiempo se divide en un arreglador superior que permanece fijo en la parte superior y un arreglador inferior debajo de él. De esta manera, puedes anclar las pistas que quieras que estén siempre visibles en la parte superior.
Objetos del estructurador
Los siguientes objetos del estructurador pueden existir en la línea de tiempo.
Regiones
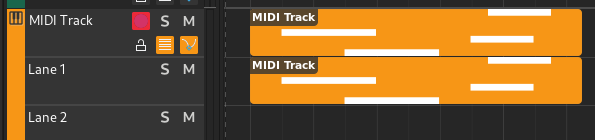
Regions (or clips) are containers for events or data (such as MIDI notes and audio clips - see below) that can be edited in an editor. Regions can be repeated, like below.
Región
Existen los siguientes tipos de regiones.
Regiones de audio
Audio regions contain audio clips from audio files.
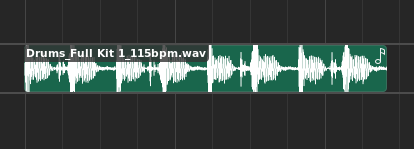
Audio region
Audio regions belong to track lanes and appear inside Audio tracks.

Audio track with audio region
Double-clicking an audio region will bring up the audio editor.
Regiones MIDI
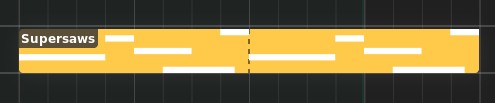
MIDI regions contain MIDI notes.
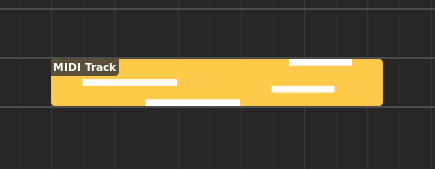
Región MIDI
MIDI regions belong to track lanes and appear inside MIDI or Instrument tracks.
MIDI track with MIDI region
Double-clicking a MIDI region will bring up the piano roll.
Regiones de automatización
Las regiones de automatización contienen sucesos de automatización.
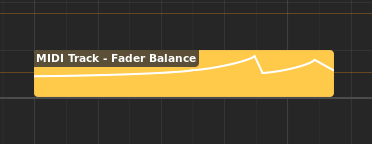
Región de automatización
Automation regions appear inside automation lanes.
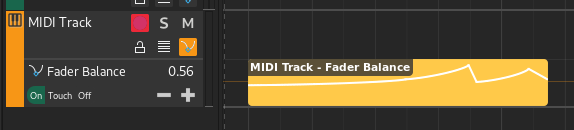
Automation lane with automation region
Double-clicking an automation region will bring up the automation editor.
Chord regions
Chord regions contain sequences of chords.

Región de acordes
Chord regions appear inside the chord track.

Chord track with chord region
Double-clicking a chord region will bring up the chord editor.
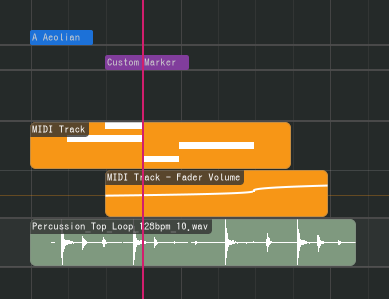
Marcadores
Los marcadores se utilizan para marcar el inicio de una sección lógica en la canción, como Chorus o Intro.

Marker
Markers appear inside the marker track.

Marker track with marker
Existen dos marcadores especiales que indican el inicio y el final de la canción. Se utilizan para exportar la canción y no se pueden eliminar.
Escalas
Scales are used to indicate the start of a section using a specific musical scale.

Scale
Scales appear inside the Chord track.

Chord track with scale
Editar regiones
Las siguientes operaciones se aplican a las regiones.
Renombrar
Regions can be renamed by selecting them and pressing F2.

Cambiar el nombre de una región
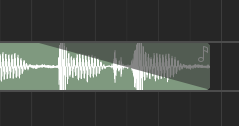
Adjusting Fades
Audio regions can have fades. Fades are gradual increases or decreases in the level of the audio signal, and their positions can be adjusted by clicking and dragging the top left/right corners of the region.
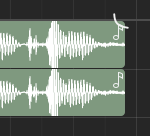
Adjusting fade out point (click & drag)
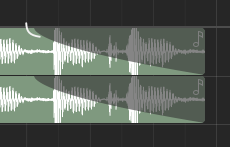
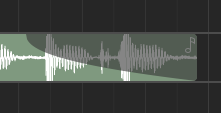
Adjusting fade out point (drop)
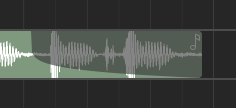
Clicking and dragging the grey part up or down will adjust the curviness of the fade.
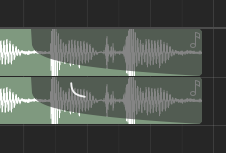
Adjusting curviness
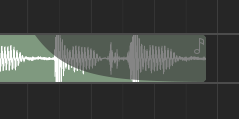
The type of fade algorithm used can also be changed by right-clicking on the fade and selecting .

Fade context menu
Fade Types
The various types of fade algorithms available are illustrated below.
Nota
All audio regions have some additional, built-in fade in and fade out that cannot be disabled. This is used to avoid clipping and should be unnoticable.
Editing Region Contents
Displaying Region Contents
Cuando se seleccionan regiones en la línea de tiempo, su contenido se muestra dentro de la pestaña Editor en el Panel Inferior. Aunque hay algunos elementos comunes compartidos entre cada tipo de editor, la sección del editor será diferente según el tipo de región seleccionada.
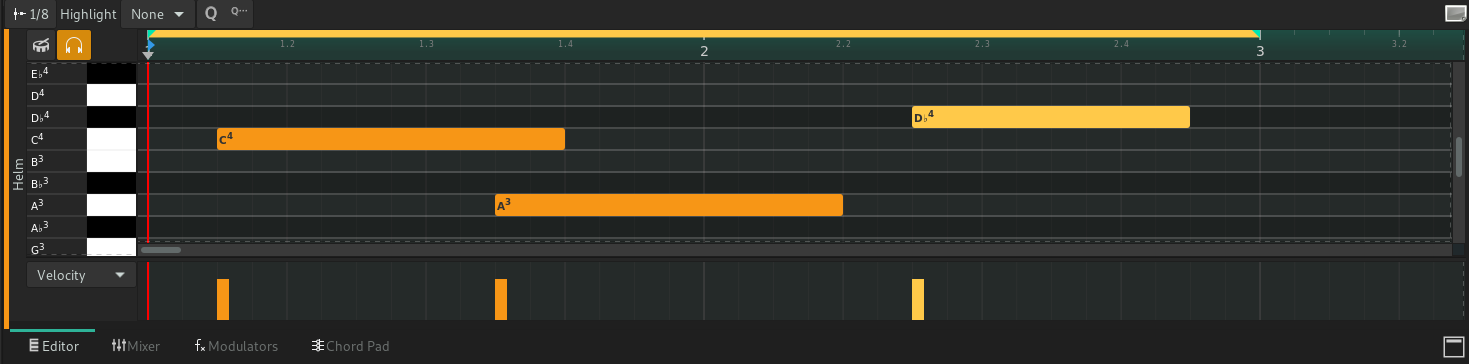
Editor Ruler
The editor ruler is similar to the timeline ruler.

Editor ruler
The ruler will display more or less information depending on the current zoom level. It will also display the following indicators.
Editor Ruler Indicators
- Song Markers
Markers created in the Marker track will be displayed here as read-only.
- Inicio del clip
Controls the position where the clip will start playback from. Displayed as a red, right-pointing arrow.
- Cabezal de reproducción
Current position of the playhead. Displayed as a grey, down-facing arrow.
- Puntos del bucle
These control the range where the clip will loop after it reaches the loop end point. Displayed as 2 green arrows.
You can move these markers by clicking and dragging.
Hacer clic y arrastrar en un espacio vacío permite ajustar la posición del cabezal de reproducción.
Regions in the Editor Ruler
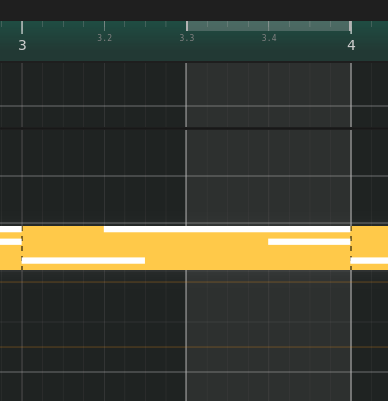
All regions in the same track as the active region will be shown inside the ruler. The active region will be displayed in a more prominent color.
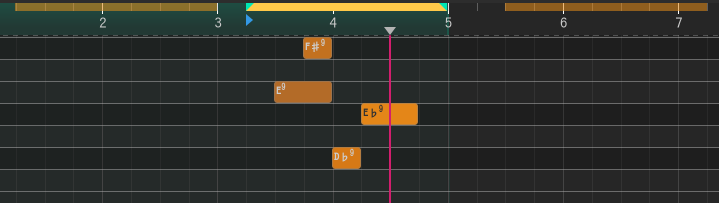
Regions in the editor ruler