Gravação
Faixas de Armamento
Tracks can be armed for recording by clicking the record button, either inside the track or inside its fader section in the channel or track inspector.
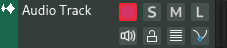
When tracks are armed for recording, they start listening for signals in their Entradas and these signals will be passed along in the processing chain.
Por exemplo, se uma faixa de instrumento estiver armada para gravação e tiver um teclado MIDI conectado nas suas entradas, ouvirá o som quando pressionar uma tecla no seu teclado MIDI.
Gravação de Áudio & MIDI
After arming the tracks you want to record events into, enable recording in Controles de transporte and press play. Any signals received will be recorded inside new regions in the timeline.

Recording audio
Entradas
Audio and MIDI/Instrument tracks have an Entradas section in their Inspector Page to adjust inputs for recording.
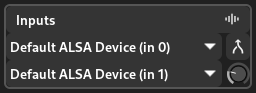
Track inputs
Configurações de gravação
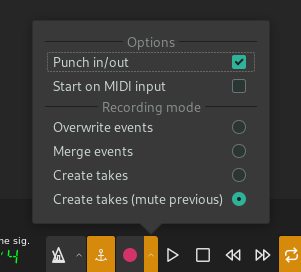
Clicking the arrow next to the record button will bring up the recording settings where various options and recording modes can be selected.
Configurações de gravação
Options
- Punch in/out
Whether to use punch in/out markers. When this is enabled, recording will start when the playhead reaches the punch in marker and stop when the playhead reaches the punch out marker.
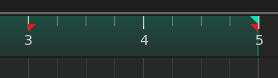
Punch in/out range, indicated by red markers
- Start on MIDI input
Automatically start recording when an event is received from a MIDI device
Recording Modes
- Overwrite events
Overwrite any existing events in the track during recording
- Merge events
Merge the newly recorded events with the existing events in the track
- Create takes
Create a new lane (take) for each new recording
- Create takes (mute previous)
Similar to Create takes but mutes the last recorded take before creating a new one

Create takes (mute previous)
Automação de Gravação
A automação pode ser gravada em modo «trinco» ou modo «toque». O modo pode ser selecionado e alternado clicando sobre ele dentro das pistas de automação.
Trinco
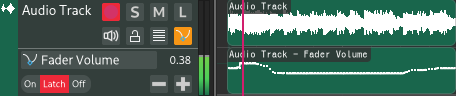
No modo de trinco, a automação será escrita constantemente e sobrescreverá a automação anterior.
Toque
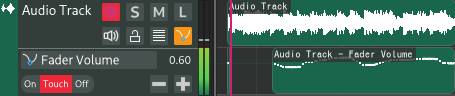
No modo toque, a automação será gravada apenas quando houver alterações. Quando as mudanças deixarem de ser recebidas (após um curto tempo), a automação deixará de ser gravada até que uma mudança seja recebida novamente. Isso é útil para fazer pequenas alterações na automação existente.
Nota
Ao contrário da gravação MIDI/áudio, a gravação automática não requer Gravação para ser ativada no Controles de transporte.